Table of Contents
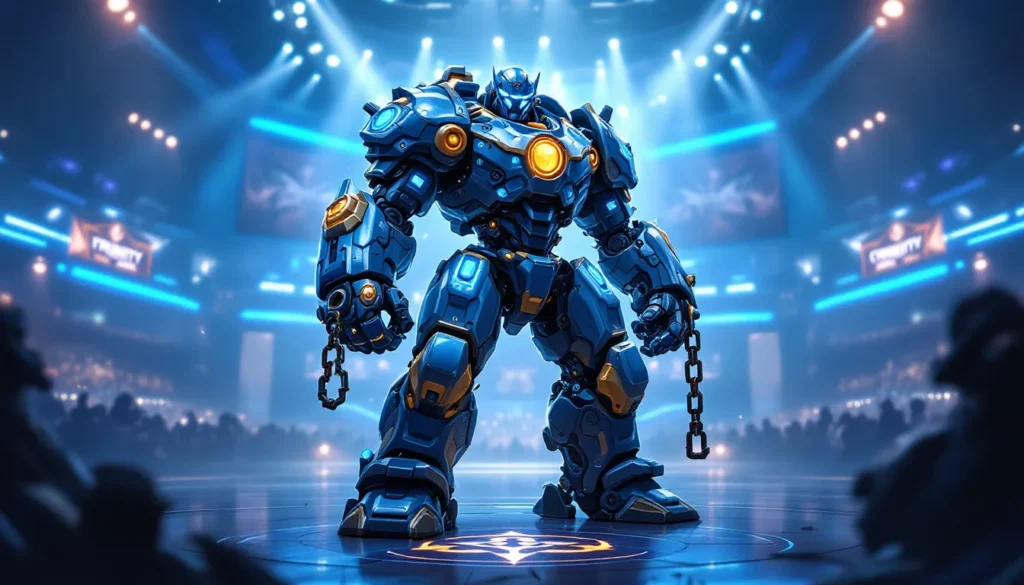
ToggleOrnn stands as one of League of Legends’ most unique champions, a tankish top laner who defies traditional role conventions by offering engage tools, crowd control, and team-wide utility through item upgrades. Released in 2017, he’s remained a consistent presence in solo queue and competitive play, though his viability shifts with the meta. If you’re looking to climb the ranks or simply want to understand this goat-themed deity, you’ve come to the right place. This guide covers everything from ability mechanics to late-game positioning, complete with real build paths and matchup strategies that work in 2026.
Key Takeaways
- Ornn is a unique tank champion whose passive ability grants teammates upgraded items with bonus stats, making him invaluable for coordinated team compositions despite vulnerabilities in the early game.
- His kit revolves around crowd control and engagement tools—Q knockback, E dash with shield, and R ultimate displacement—that create multiple angles for initiating fights and controlling team fights.
- Master Ornn by prioritizing survival through farming during levels 1–5, abusing power spikes at level 6 and 11 with jungle support, and itemizing adaptively based on enemy team composition.
- Build tank-focused items like Kaenic Rookern, Abyssal Mask, and Thornmail into most matchups; reserve damage builds like Liandry’s only when significantly ahead or your team desperately needs offense.
- Wave management and positioning are critical for separating good Ornn players from great ones—slow-push into aggressive matchups, fast-push into scaling opponents, and position slightly forward in teamfights so the Forge God knockback scatters enemies away from your team.
- Favorable matchups like Sion, Maokai, and Ryze reward aggressive level 6 all-ins, while difficult matchups like Jayce and Yone require patient farming and jungle coordination to overcome their early-game advantages.
Who Is Ornn and What Makes Him Unique
Ornn’s Role and Playstyle
Ornn is a top-lane tank with a fascinating kit that blurs the line between support and full-damage engage. Unlike champions like Malphite or Sejuani, Ornn doesn’t just soak damage and disrupt, he fundamentally amplifies his team’s power through his ultimate and passive mechanics. His playstyle revolves around creating opportunities through knockback effects and initiating fights in ways that catch enemies off-guard.
As a forger of legend, Ornn grants himself and allies access to upgraded versions of items via his passive ability. This means your teammates benefit directly from your itemization, giving him an indirect support function that scales throughout the game. He’s not a utility support, but he enables his carries to reach their win conditions faster. This unique identity makes him invaluable in coordinated team environments but requires teammates who understand the mechanic to maximize value.
The pacing of an Ornn game is deliberate. Early levels emphasize farming and survivability. Mid-game is about establishing presence through ult engages and pick potential. Late game turns into positioning puzzles where his knockback abilities can turn fights around entirely. Understanding this tempo is crucial to playing him effectively.
Key Strengths and Weaknesses
Strengths:
- Team utility through items: Upgraded items significantly boost ally damage and defense, making Ornn one of the few tanks who scales multiplicatively with team gold
- Crowd control and engage: His Q knockback, E charge, and R knockup provide multiple angles for initiating fights
- Self-sufficiency: Unlike supports, Ornn doesn’t fall off if behind because he still provides value through passive upgrades
- Sustain in lane: His W grants damage reduction, helping him survive poke from ranged top laners
Weaknesses:
- Early game vulnerability: Levels 1-6 are rough. Ornn has no hard CC until level 6, making him vulnerable to aggressive early-game top laners
- Mobility limitations: He lacks a true escape. His E is short-range and leaves him vulnerable if enemies are alert
- Upgrades require allies to have items: If your team is behind and hasn’t completed items, the passive loses impact
- Kiting issues: Ranged champions who can maintain distance exploit him heavily
Understanding these trade-offs helps determine when to pick Ornn and when to pivot to a different top laner for a matchup.
Ornn’s Abilities Explained
Passive: Forgefire Soul
This passive makes Ornn the kingmaker of League. Every 1-3 levels (the cooldown decreases as you level up), Ornn can forge an item for himself and any ally with a completed item. The forged item grants bonus stats, usually 5% bonus AD or AP and 50-100 bonus health depending on the item. By level 13, the cooldown resets to 3 levels, meaning you’ll forge constantly in late-game teamfights.
The nuance here is understanding when upgrades matter most. Upgrading your ADC’s Infinity Edge or Crescent is usually higher priority than upgrading your own mythic early on, since their damage scales harder. By level 16, the passive essentially guarantees your entire team is two items ahead in raw stats by the time three items are completed.
Q: Volcanic Rupture
Q sends a straight-line wave of magma that explodes on the first enemy hit or when reaching max range. Enemies hit take 60-180 base damage (+ 60% AP) and are knocked back slightly. The ability has a 9-second cooldown and costs 50 mana at all ranks.
This is your primary poke and waveclear tool early game. In extended trades, hitting Q guarantees follow-up damage from your W. Against melee matchups, it creates space and punishes gap closers. The knockback is subtle but crucial, it interrupts animations and prevents enemies from closing distance momentarily. Max this second after E for wave management.
W: Bellows Breath
W is deceptively powerful. Ornn breathes fire in a cone for up to 2 seconds, dealing 40-120 base damage per second (+ 40% AP) and reducing damage he takes by 20-40% while active. Enemies hit are slowed by 40%. Damage ramps up as enemies stay in the breath longer, maxing at 100 base damage per second.
This is your sustain tool and safety button. Against burst matchups, holding W can mitigate massive damage windows. Against poke-heavy opponents like Jayce or Teemo, the damage reduction is essential for survival. Don’t just spam it, use it strategically during all-ins or when enemies commit hard.
E: Searing Charge
E charges forward a short distance, dealing 60-180 base damage (+ 50% AP) and knocking up enemies for 1 second. On hit, you gain a shield equal to 5% of your max health per enemy hit (cap 25%). The cooldown is 10 seconds (9 with ability haste).
This is your engagement tool and the linchpin of your teamfighting. Unlike R, E is always available for initiations. The shield scaling means hitting multiple enemies increases your survivability exponentially. In teamfights, E into enemies, then let W run, then R for the cleanup. Max this first, it’s your bread and butter.
R: Call of the Forge God
R summons a massive Forge God that charges toward the nearest enemy. Any enemy in its path is knocked back and takes 100-300 base damage (+ 70% AP). The cooldown is 120-100 seconds depending on rank, with a long wind-up animation.
This ultimate defines Ornn’s identity. It’s an engage tool, a disengage tool, and a zone tool all rolled into one. The knockback is significant enough to displace entire enemy team positioning, turning fights in your favor. But, the long animation means skilled enemies can prepare for it. Use it to separate carries from protection or to disengage when your team is getting overrun.
One critical tip: The Forge God’s path is predictable. Smart enemies will reposition preemptively if they see the animation. Use it when enemies are clustered or when prediction favors your team.
Best Build Paths and Item Recommendations
Tank-Focused Builds
This is the standard build path for most matchups and play patterns. It prioritizes durability while maintaining engage potential.
Mythic options:
- Kaenic Rookern (into magic-heavy teams): Grants magic damage reduction for the whole team when you use abilities, making it your go-to versus AP-heavy compositions. The combination of tankiness and team utility is unmatched.
- Hollow Radiance (into balanced damage): Standard tank mythic. Provides aura resistance to nearby allies and scales with ability haste.
- Iceborn Gauntlet (rare, into slippery targets): Slow effect synergizes with your engage, forcing enemies into your team.
Core items after mythic:
- Abyssal Mask (magic defense): 40 magic resist + mana. The aura effect stacks with Hollow Radiance for absurd team resistance values. This is nearly always your second item into AP threats.
- Thornmail (physical defense + grievous wounds): Crucial against auto-attack reliant champs and carries. The grievous wounds effect spreads when you use W in their direction.
- Spirit Visage (magic defense + healing): If your team has significant healing (Soraka support, for example), this multiplies it.
- Force of Nature (magic defense + movement): Good into full AP teams where you need to kite backward without being run down.
Late-game items:
- Overlord’s Plate (pure tankiness): Just absolute durability. The tenacity helps against perma-CC enemies.
- Hollow Radiance (if you haven’t built it): Second aura item if the game goes late and you need more resistances.
Example full build (into 2-3 AP team): Kaenic Rookern → Abyssal Mask → Thornmail → Spirit Visage → Overlord’s Plate → situational
Damage-Oriented Builds
Occasionally, if you’re significantly ahead or in a low-CC team, you can itemize for offense. This is riskier but lets you carry.
Mythic options:
- Liandry’s Torment (AP tank): Provides burn damage and penetration. Your W and R become legitimate damage sources.
- Sunfire Aegis (tankier AP): Aura damage scales with ability haste. Less damage output than Liandry’s but safer.
Core items:
- Riftmaker (if going full AP): Penetration + sustain. Your abilities hurt, and you’re harder to kill.
- Demonic Embrace (burn + magic res): Current meta item. Scales with max health, so it works with tank itemization while adding burn damage.
When to build this: Only if you’re 3+ kills up by 10 minutes or your comp desperately needs damage. Otherwise, you’re gutting your usefulness.
Situational Items and Adaptations
Against hard CC (like Lissandra support or Thresh):
- Prioritize Kaenic Rookern early and rush Overlord’s Plate for tenacity stacking. Mercury’s Treads are mandatory.
Against heavy poke (like Azir or Heimerdinger top):
- Build Hollow Radiance second to reduce everyone’s poke damage simultaneously.
Against healing teams (like Sett + Rakan):
- Thornmail first, then Mortal Reminder (if you build AD items, which you won’t). Actually, ask your ADC to build it, you focus on tankiness while they apply grievous wounds through attacks.
Against burst (like Renekton or Le Blanc):
- Kaenic Rookern + Abyssal Mask and play safer early. Lean on W for the damage reduction.
Rune Selection and Keystones
Primary Rune Pages for Different Matchups
Grasp of the Undying (into scaling matchups):
This is your default rune. Every 4 seconds in combat, your next basic attack heals you for 4-180 (based on level) and grants bonus health temporarily. The healing sustains you through poke matchups and the health stacks scale into late-game bulk.
When to use: Into Jayce, Teemo, Gnar, Ornn vs Ornn mirrors, or any matchup where you’ll go even early and want to out-scale them. Combine with Demolish to shove waves after winning fights.
Electrocute (into all-in matchups):
Yes, AD tank Ornn exists and Electrocute enables it. Landing E guarantees Electrocute proc, adding 50-180 damage (based on level) to your combo. This transitions into one-shotting unsupported targets mid-game.
When to use: Into immobile squishies like Ryze or Annie top, or if you’re smurfing and confident in your mechanics. Risk it if your team needs damage more than tankiness.
Aftershock (into engage-heavy lanes):
Immediately after crowd controlling an enemy, you gain resists for 3 seconds. This directly counters burst from Renekton, Darius, or Pantheon by reducing their damage as you initiate.
When to use: Into champions with guaranteed gapclosers. You E into them, Aftershock triggers, and suddenly you survive what would’ve killed you otherwise.
Glacial Augment (rare, into kiting matchups):
Your first attack against an enemy slows them and surrounding enemies. Combined with Ornn’s Q and W slows, kiting becomes impossible.
When to use: Only if your entire team is engage-focused and the enemy has zero CC. Niche pick in very specific drafts.
Secondary Runes and Stat Shards
Secondary path (nearly always):
Pick Resolve (Unflinching + Revitalize) or Precision (Triumph + Tenacity).
- Unflinching + Revitalize: Cuts crowd control duration and amplifies your self-healing. Standard for poke matchups.
- Triumph + Tenacity: Provides cleanup healing after kills and stacks tenacity for CC reduction. Better into all-in comps.
Stat shards:
- Flex stat: Always +10 Ability Haste. Reduces cooldowns on your engage tools.
- Defense stat: +10 Armor or +8 Magic Resist depending on opponent. Use Armor into AD-heavy comps, MR into AP.
- Offense (rare): Use +9 Adaptive Force if you’re going damage-oriented builds, but this is uncommon.
Example rune page (standard):
- Primary: Grasp of the Undying / Demolish / Font of Life / Overgrowth
- Secondary: Unflinching / Revitalize
- Shards: +10 AH, +10 Armor, +8 MR
Laning Phase Strategy and Tips
Early Game Positioning and Farming
Ornn’s early levels are rough. Levels 1-5, you have zero crowd control, limited engage, and no shield from E for self-defense. Your goal is survival and CS accumulation.
Positioning principles:
- Stay near your tower until level 6. Ornn is a farming bot early: accept it.
- Space yourself away from melee minions when possible. Use your Q from range to secure cannon minions without walking up.
- Against ranged matchups (Teemo, Jayce), only walk up to last-hit. Don’t walk into poke range between last-hits.
- Use your W to soak chip damage when enemies poke you between minion waves.
Farming efficiency:
- Aim for 6 CS per minute early game. This means roughly 6 minions every 10 seconds. It sounds low, but relative to competitive standards it’s attainable and safe.
- Cannon minions are worth 10 regular minions in gold value. Never skip them. Use Q from max range if necessary.
- If you’re behind, prioritize cannon minions and jungle camps over trying to outrade enemies.
Remember, Ornn’s strength is late-game. Getting out-traded early is fine as long as you survive and remain relevant in fights.
Trading and Harassment Tactics
Don’t trade until level 6 unless you have a significant positional advantage (enemy overextended toward your tower).
Post-level 6 trading patterns:
- Look for all-ins when enemies are at 50-60% health. E onto them, auto-attack, activate W, then R if they try to escape. This combo does surprising damage and sets up ganks for your jungler.
- If they fight back, your E shield + W damage reduction often wins extended trades.
- Never chase enemies who play around cooldowns. If your E is down, they control the fight.
Harassment tactics (subtle):
- Q spam into enemies near their tower doesn’t win the lane, but it forces them to base or stay at low health. This creates gank opportunities.
- Walk threateningly up the lane after your ultimate is available. Enemies respect the threat of an ult engage even if you don’t use it.
- Target the enemy ADC if they’re in top lane for a Teleport swap. Force them to base and reset the lane.
Managing Wave Dynamics
Wave management is where Ornn separates good players from great ones.
Slow-pushing (into a dive-prone matchup like Renekton):
- Kill enemy minions slowly, ensuring your wave stays small while the enemy wave grows. After 2-3 waves, you have a massive minion advantage that forces them to respect your zone or get run down.
Fast-pushing (into a scaling matchup like Sion):
- Kill minions as fast as possible, shoving the wave into their tower. They’re forced to farm under tower (losing CS to splash) or fight you with the wave advantage in your favor.
Freezing (when you’re ahead or they’re all-in on a roam):
- Keep the wave balanced near your tower, forcing them to overextend to farm. This makes them vulnerable to jungler ganks.
Most commonly, you’ll slow-push into smaller matchups and fast-push into utility-heavy champions. Understand why before autopiloting wave patterns.
Mid and Late Game Teamfighting
Ultimate Usage and Engagements
Ornn’s ultimate defines his identity in fights. It’s not just damage, it’s a repositioning tool that can swing entire team compositions.
When to use R aggressively:
- Enemy carry is separated from their team (no protection). R them away from allies, allowing your team to burst them.
- Enemy team is grouped but immobile. R into them, scattering them so your team can pick off isolated targets.
- You’re protecting your carry from a diver (Talon, Le Blanc). R the diver away, resetting the fight.
When to hold R for defense:
- Your team is getting run down. R to knock back the closest threat and reset positioning.
- Enemy is diving through your backline. R between them and your carries for peel.
- Don’t ult if you’re the only threat, you need follow-up damage or your R accomplishes nothing.
Positioning for R:
- Stand slightly forward of your team so the Forge God paths toward enemies, not your team. If you’re behind your team and ult, the knockback often pushes enemies toward your team, the opposite of intended.
- Angle the ult so the path separates enemies from their win condition (separate ADC from support, separate jungler from team, etc.).
Example scenario: It’s a 5v5 fight. Enemy ADC is left-side, support is center. Ult from your right side so the Forge God hits the ADC, knocking them left and away from their support. Your team pounces on the isolated ADC while their support is too far to help.
Positioning in Objective Fights
Baron and Dragon fights:
- Stay between your team and the objective if you’re ahead. Your tankiness forces enemies to go through you to contest the objective.
- If you’re behind, stay beside your team rather than in front. You’re zoning from the sides, not blocking with your body.
- Your W is crucial here. Activate it preemptively if enemies have poke (Nidalee, Lux), reducing the damage your team takes while securing the objective.
Tower defense:
- Position between the tower and enemy team. Your E and R knock enemies back, away from the tower, protecting it passively.
- After a successful trade, plant yourself on the objective (tower, Baron pit) and let enemies approach you. Control the space.
Inhibitor and nexus fights (elder game):
- You’re not a backline protector here. You’re frontline engage. E into enemies, W to stay alive, R to finish. Let your team follow your engage and clean up.
- If you die but your team gets a 4v3, that’s a win. Ornn’s role is initiation, not peel.
Understanding the subtle differences between defensive and offensive positioning separates smurfs from hardstuck players. Context matters, there’s no universal “best” position.
Common Matchups and Counter Strategies
Difficult Matchups for Ornn
Jayce (very difficult, 40-60 matchup):
Jayce’s range and poke deny Ornn early engage. His gate provides movespeed to kite away from your E. Goal is survival until level 11+ when you have two ranks of R for repeated engage.
Play for farm and leverage jungle assistance. When Jayce transforms to melee at level 6, that’s your window. He’s vulnerable for a few seconds, E him and go all-in. Max W second if he’s spamming Q poke.
Teemo (skill matchup, 45-55):
Teemo’s blind shuts down your W damage reduction potential (it blocks your auto attacks). His poison poke drains your health constantly. Don’t engage all-in, instead, maximize Q range poke and rotate mid lane for plays.
Build Hollow Radiance second to reduce his poke damage for your team. Late-game, you outscale him significantly, so just survive and farm.
Darius (difficult early, 40-60):
Darius dungeons Ornn levels 1-6. His bleed stacks are dangerous and his hook catches you if you’re positioned carelessly. Respect his damage window and hug tower.
After level 6, your engage and R knockback gives you tools to fight him. Space from his hook range, use E to dash away from his R range if possible. This is a timing matchup, win at level 6-9 with jungle support, or lose late-game when he scales.
Yone (difficult mid-game, 35-65):
Yone’s mobility and extended range make him hard to catch. He dashes out of your W and dodges R with practice. His damage is frontloaded early, and you can’t out-damage him.
Focus on staying alive and scaling. Farm safely and wait for him to make a mistake. When he uses his E-W combo to extended reach, he’s vulnerable, E onto him immediately and stun him in your W. Otherwise, focus on teamfighting where his isolation won’t matter.
Favorable Pairings and How to Dominate
Gnar (favorable, 60-40):
Gnar’s mobility is limited when mega. When he’s mini, he’s squishy and slow. Abuse these windows. When he’s mega and grouped with team, avoid all-ins since his knockback combos with yours awkwardly.
Farm safely until level 6, then start forcing trades immediately after his ultimate cooldown expires. If he’s mega in lane, just farm for 20 seconds until mini form returns. Dominate the spacing game.
Sion (favorable, 65-35):
Sion’s immobility is your ally. Your Q and E both have better range and faster animations than his. Control spacing and never let him get close enough for his Q combo.
All-in at level 6 is almost a guaranteed kill if he doesn’t respect your R cooldown. Late-game, you both tank but you provide team utility through item upgrades, making you inherently stronger. Dominate by having first R in all fights.
Maokai (favorable, 70-30):
Maokai is a worse version of you. He has CC but less tankiness. You out-trade him at all stages. Force early engages and punish his lack of mobility.
Build Kaenic Rookern first into his AP damage and watch his damage output plummet. By midgame, you’re a superior tank with better engage, superior item scaling, and better teamfight presence. Dominate by abusing his early vulnerability and never letting him scale comfortably.
Ryze (favorable, 65-35):
Ryze has zero mobility early and his damage requires setup. All-in him at level 6 before he gets items. His short-range combos mean he has to walk into your E range.
Gank pressure is paramount, coordinate with jungler for level 6 dives. By midgame, he’ll have items to kite you, but early coordination secures a lead that persists. Dominate by taking early objectives and extending your lead before his Tear completes.
Consulting resources like Mobalytics for updated matchup statistics is helpful since the meta shifts with balance changes, but these fundamental principles remain consistent across patches.
Conclusion
Mastering Ornn in 2026 requires balancing patience with aggression, understanding your item upgrade timings, and respecting the nuanced positioning demands of teamfighting. He’s not a flashy champion, he’s a backbone that enables your team’s win condition while providing his own threat through crowd control and engage.
The key takeaways are straightforward: survive early, abuse your level 6 and 11 power spikes, itemize correctly for your team composition, and position with purpose. Your goal isn’t to “carry” in the traditional sense but to control fights, help objectives, and ensure your carries have the space and defensive scaling they need to pop off.
Practice the wave dynamics, learn your difficult matchups inside-out, and embrace the grind. Ornn rewards consistency and macro understanding far more than mechanical flashiness. By the time you reach teamfight stages, you’ll find that the games you win share a common thread: you played Ornn correctly, and everyone on your team benefited.
For deeper meta insights and recent balance updates, LoL Esports provides current professional play trends, while resources like Game8 offer tier lists and meta snapshots. Keep learning, keep adapting, and forge your way to victory.